Dynamic Resource Scheduler
Whats New!
User Experience Changes
Security and Authentication
Modules and Utilities
Cyclical Scheduling - Configuration Interface
Cyclical Scheduling - Now Bulk Scheduling
Resource Quotas Improvements - Percentages
Architecture and Scheduling
Configuration
User Guides and Help
Get to Know Dynamic Resource Scheduler
How Does Dynamic Resource Scheduling Work
Speaking the Language of Scheduling
Navigating Dynamic Resource Scheduler
How your Data Links Together
Managing your Organisation
Viewing your Data
Your Customer Data
Your Service Orders
Your Jobs
Your Workers and Resources
Manage Your Tasks
Actioning your Jobs and Tasks
Job Templates
Find A Jobs Possible Workers
Locking Your Jobs
Create a Follow On Task
User Queues and Organising Your Tasks
Schedule and Organise
How to Optimise Your Scheduling
How to Schedule Manually
Scheduling Mutliple Jobs at Once
Reassign and Reschedule your Tasks
Managing Your Time and Durations
Managing your Comments and Contacts
Using Bookmarks to Drive Efficiency
Managing Your Job Status
Visualising Your Planning
Workers and Resources
Advanced Data Management
Creating Unavailability in your Workforce
Adding an Unavailability to an Individual Worker
Creating Unavailabilities for Multiple Days or Workers
Maps And Journey
Using Maps to Visualise Your Data
Using Maps With Your Data
Learn about our Closest Function
Your Journeys
Meetings and Non-Productive Planning
Administer Your Scheduler
Managing Your Organisations and Agencies
Managing Your Custom Data
Managing your Contracts
Customising Your Experience
Managing Depots and Starting Locations
Managing Diary Bookmarks
Managing your External Chart Views
KPI Settings
Managing Your Priorities
Learn about Sectors
Managing Your Follow On Templates
Get To Know Your Working Time Calendar
Managing your SOR Templates
Managing your Job Templates
Managing Your Vocabulary
Managing Your Bookmarks
Manage Your Customer Templates
Get to Know Import and Export
Managing Your Tenant Code Rules
Managing your Order Templates
Managing Your Unavailability Reasons
Get To Know Your Working Time Calendars
Managing your Worker Templates
Releases and Readiness
DRS 6, DRS 5.7 and Job Manager
User Guides and Help
Get to Know DRS
Dynamic Scheduling - How does it work
Navigating DRS
Vocabulary and Concepts
Customers
Orders
Jobs
Scheduling Jobs
Job Functions
Workers
Views
Object Inheritance
Agencies
DRS Modules
Scenario Based Planning
Managing your SMS Service
5.7 Documentation
Technical Documentation
Release Notes
DRS 6.1 Release Notes
DRS 6.1.22 - February 20, 2026
DRS 6.1.21 - September 10, 2025
DRS 6.1.20 - April 20th, 2025
DRS 6.1.19 - 11th April, 2025
DRS 6.1.18 - 13 February 2025
DRS 6.1.17 - 20th December 2024
DRS 6.1.16 - November 8th, 2024
DRS 6.1.15 - October 10th, 2024
DRS 6.1.14 - 6th September 2024
DRS 6.1.13 - 9th August 2024
DRS 6.1.12 Release Notes
DRS 6.1.11 Release Notes
DRS 6.1.10 Release Notes
DRS 6.1.9 Release Notes
DRS 6.1.8 Release Notes
DRS 6.1.7 Release Notes
DRS 6.1.6 Release Notes
DRS 6.1.5 Release Notes
DRS 6.1.4 Release Notes
DRS 6.1.3 Release Notes
DRS 6.1.2 Release Notes
DRS 6.1.1 Release Notes
DRS 6.1.0 Release Notes
DRS 6.0 Release Notes
DRS 6.0.0.0 Release Notes
DRS 6.0.0.1 Release Notes
DRS 6.0.0.2 Release Notes
DRS 6.0.0.3 Release Notes
DRS 6.0.0.4 Release Notes
DRS 6.0.0.6 Release Notes
DRS 6.0.1.0 Release Notes
DRS 6.0.1.1 Release Notes
DRS 6.0.1.2 Release Notes
DRS 6.0.1.3 Release Notes
DRS 6.0.1.4 Release Notes
DRS 6.0.1.5 Release Notes
Kirona Housing
Job Manager 9
Job Manager 9.3.0 - October 2024
Job Manager 9.1.0 - December 2022
Job Manager 9.2.0 - November 2023
Release Notes Disclaimer
Administering your Field Service Products
Supported Versions Policies
Contents
- All categories
- DRS 6, DRS 5.7 and Job Manager
- User Guides and Help
- DRS Modules
- Meetings
- Meetings Configuration
Meetings Configuration
Purpose
This article explains how to configure the key settings required to use the Meetings function within DRS. Meetings are used to add ad-hoc jobs within DRS that can attract Travel Time calculations and support optimisation of Jobs which precede and follow it.
To create meetings, refer to the article discussing Meetings.
Enabling Meetings
Before using, Meetings must be enabled. This can be done via Configuration>Screens & Features or Configuration>Users and Profiles>Profiles
Check all meeting check boxes are ticked for the profiles required.

If they are not, click Edit, tick them, then click Save.
Configuring Meetings
As Meetings touch the full breadth of the scheduling solution, there are several steps required to ensure they are fully configured. These steps should be followed in order to ensure that each point of configuration is completed correctly.
Configure a meetings job template
The Job Template will be used to create the appointment for the resources Diary.
Navigate To: Configuration > Templates > Job
Change the meeting filter to Yes, then click Refresh.
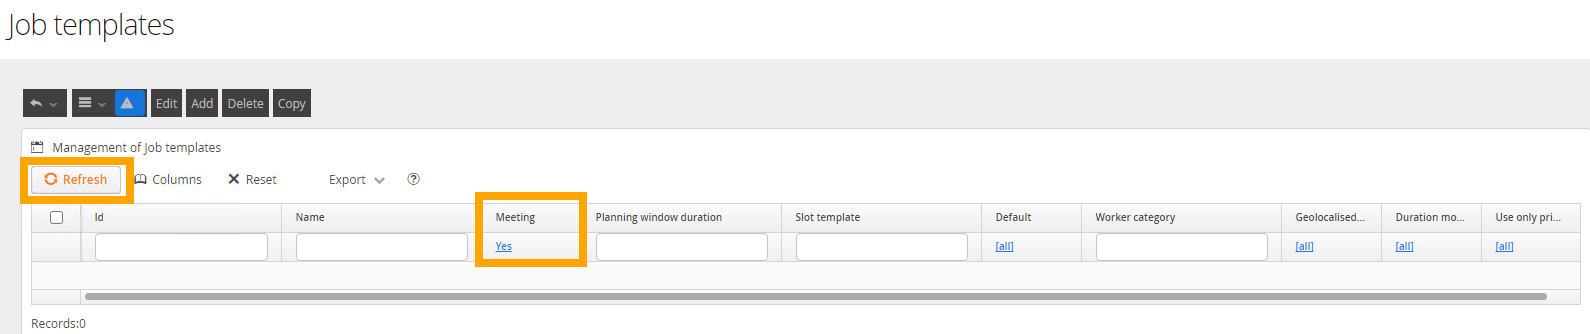
If a job template is shown, skip to the next section.
Otherwise click Add.
Enter a unique Id and Name, set Template for meeting to Yes, then click Save.

Configure a Meeting Service Order Template
The Service Order Template will be used to create the Service Order which will maintain all of the associated diary appointments for the resources Diary.
Navigate To: Configuration > Templates > Order
Change the meeting filter to Yes, then click Refresh.
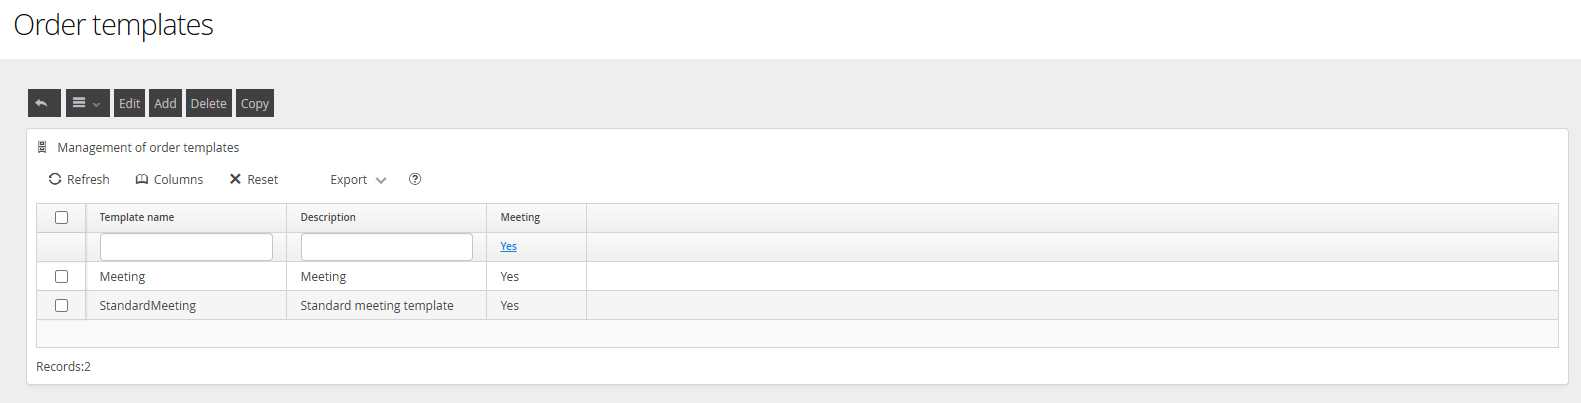
If an order template is shown, skip to the next section.
Otherwise click Add.

Enter a unique Id and Name, set Template for meeting to Yes.
In the Job Template drop down, you will be able to select the appropriate configured Meeting Job Template for this Service order.
When you're ready, click Save.
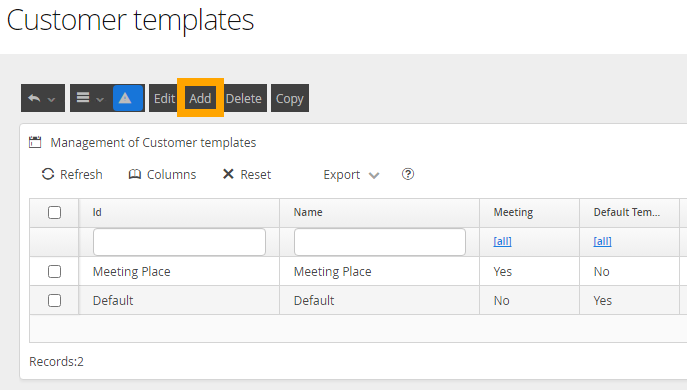
Configure a Meetings Customer Template
A Meeting Customer Template will be used to define the Location for your meeting. Meetings can only be created at specifically designated Meeting Locations.
A Meeting Location can share a physical location with another Customer record within DRS, however, it must have a Unique ID value.
Navigate To: Configuration > Templates > Customer
Set the Meeting filter to YES. If a row with a meeting value of Yes already exists, check if this record has the correct location details. If it does, skip to the next section.
Otherwise, click Add.
If a row with a meeting value of Yes already exists, skip to the next section. Otherwise, click Add.
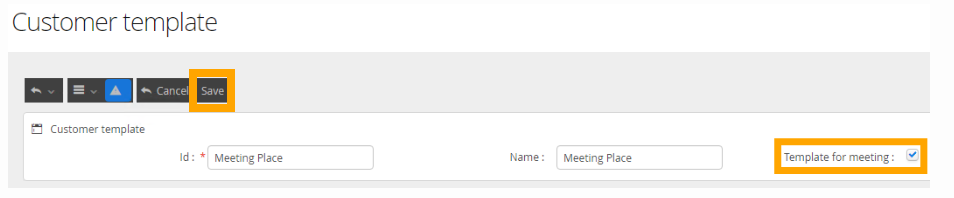
Give the meeting customer template a unique ID and name, tick template for meeting, then click Save.
Configuring Custom Business Data for Templates
After configuring your Templates, custom settings and default Business Data can be added to pre-populate, hide, or mandate fields to be completed before meetings are set.
After saving any Template, clicking into the template will present you with the Customised Object Attributes menu.
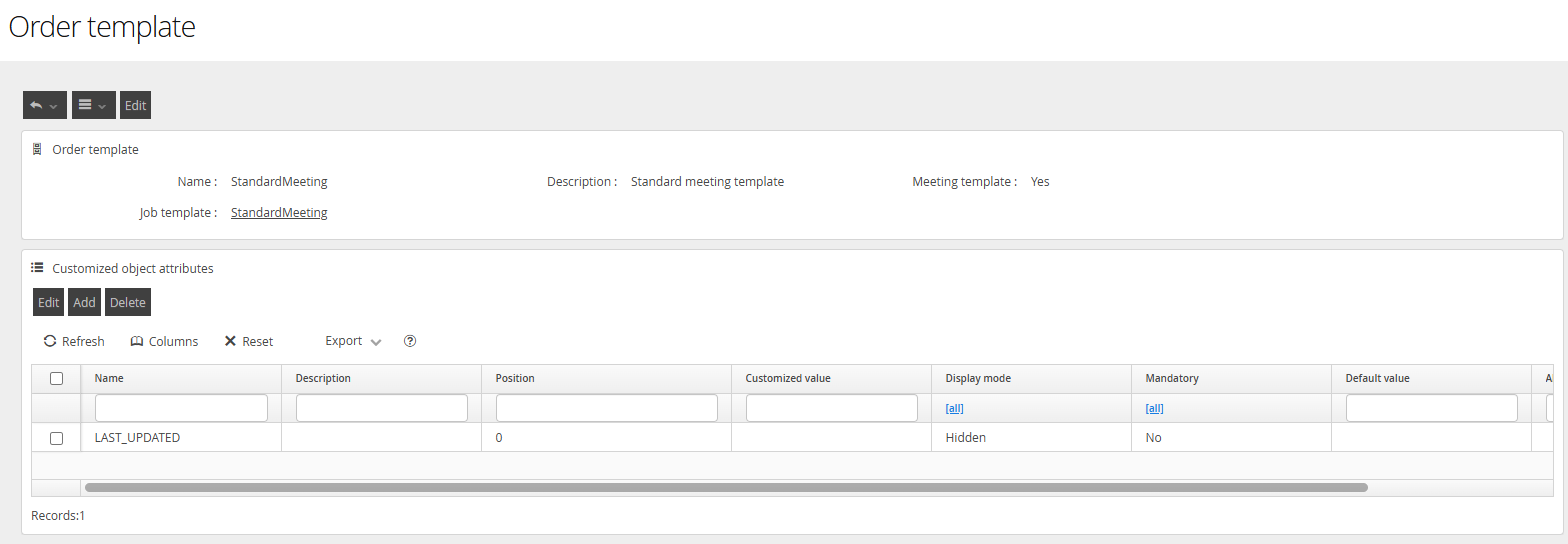
By clicking Add, or Edit, you can add and modify entries to suit your configuration needs.
Clicking Add will present you with a list of possible options;
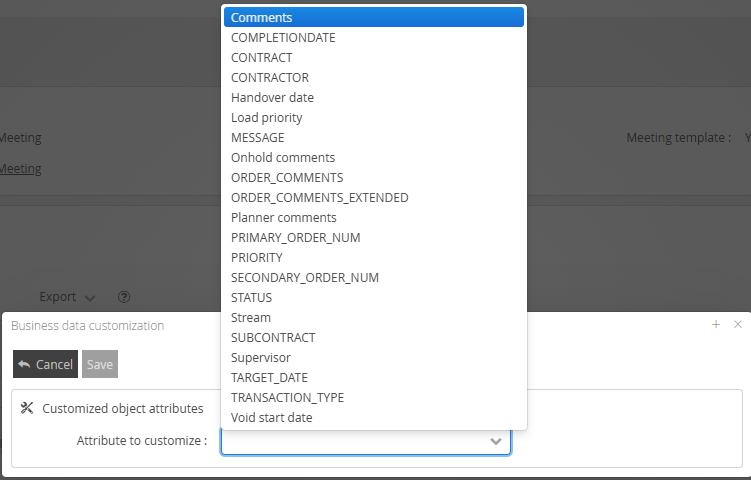
Selecting an Attribute will display a menu of options which may differ, based on the object type selected.
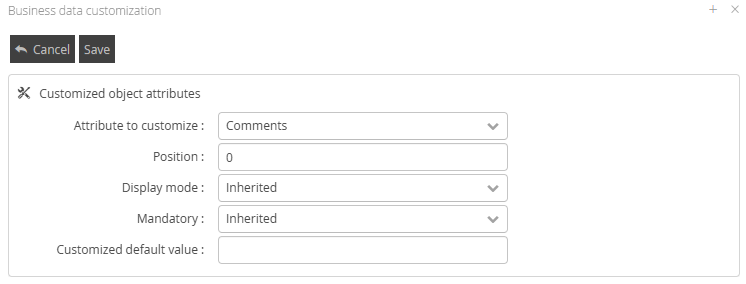
Values marked as Inherited will accept the configuration of the default Business Data item. Changing these values from Inherited to any other value will change the behaviour of these items for this Template only.
Attribute Options
The possible values are:
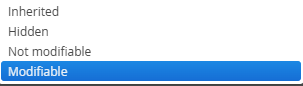
Hidden: This attribute will be hidden from the user but all other settings for this attribute will be applied as configured. Users will not be able to edit this field on meeting creation.
Not Modifiable: This attribute will be displayed and all other settings for this attribute will be applied as configured. The User will be able to view but not edit this field.
Modifiable: This attribute will be displayed and all other settings for this attribute will be applied as configured. The User will be able to view and edit this field.
Customized Default Values
Setting a Customized default value will set this value to the field on each Meeting that is created using this Template.
The Attribute Options selected will determine if the user is able to view and/or edit these values when the Meeting is being created or managed. A popular use of this function would be to set a default Primary Order Number, or, some default Comment and Description strings to speed up the creation of Meetings.
Once you have completed your changes, click Save, and your attribute and associated configuration will be displayed.

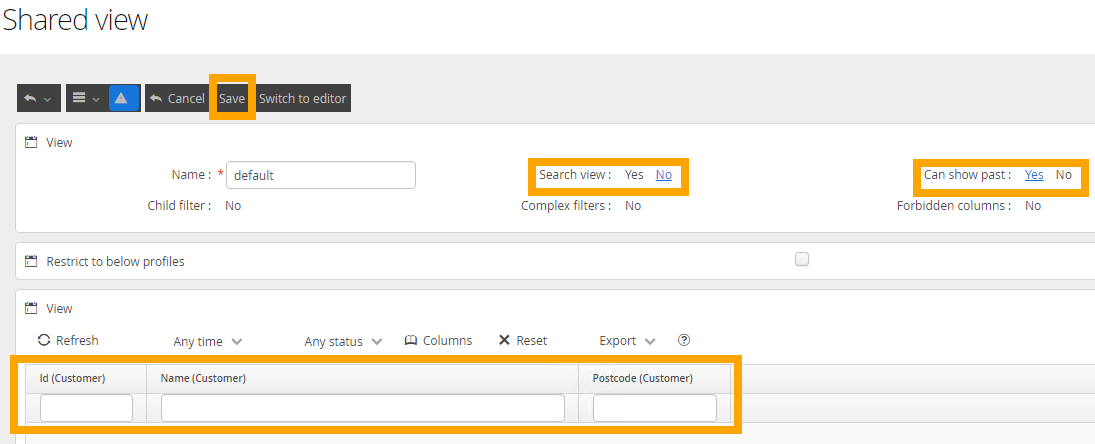
Configure a meeting room shared view
When creating a Meeting, a view is required to view the possible Meeting Locations that you have configured. Configuring a Meeting Room view can be done by navigating to this menu;
Navigate To: Configuration > Views > Shared views
and selecting Meeting room from the dropdown list.
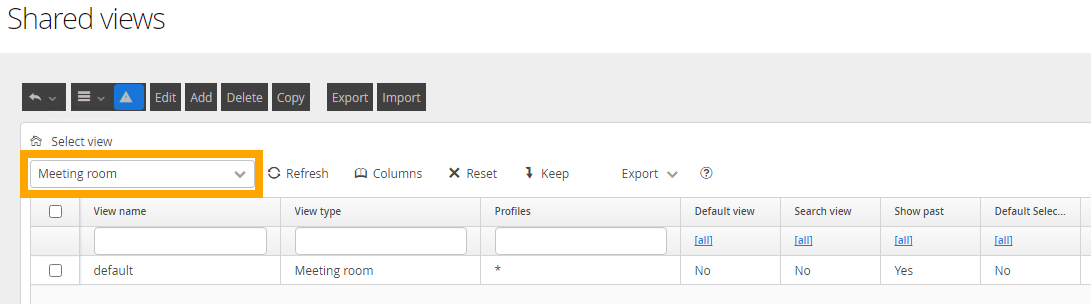
If a view called 'default' already exists, select it and then click Edit, change its configuration to suit your business needs as required. If required, multiple Meeting Room views can be configured to suit your business and user needs.
Click here to lean more about configuring views.
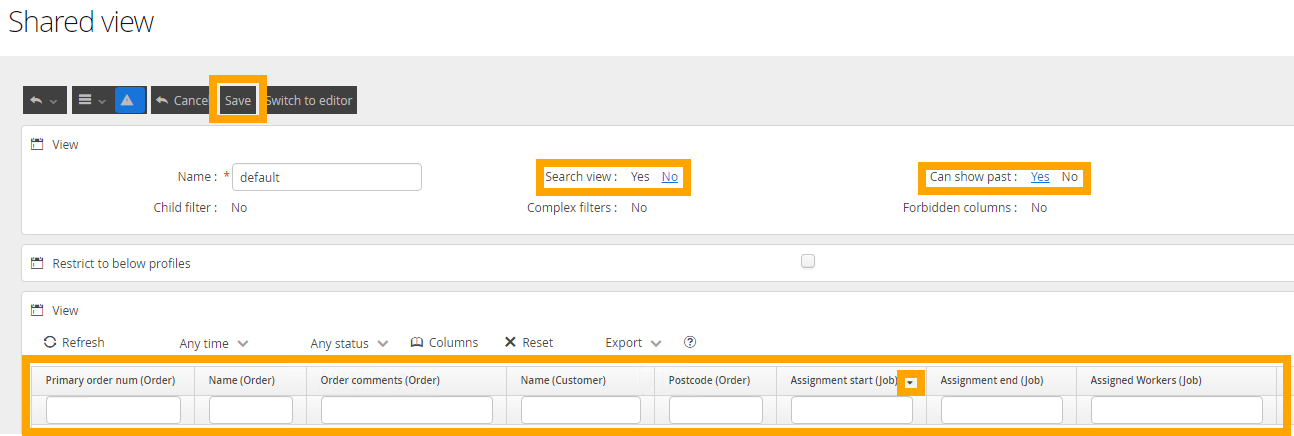
Configure meeting shared view
As with all other Object views, a minimum of one configured view is required to display any created Meetings. There is a single view configured by default, you can find this by navigating to this menu;
Navigate To: Configuration > Views > Shared views
Then select Meeting from the dropdown list.
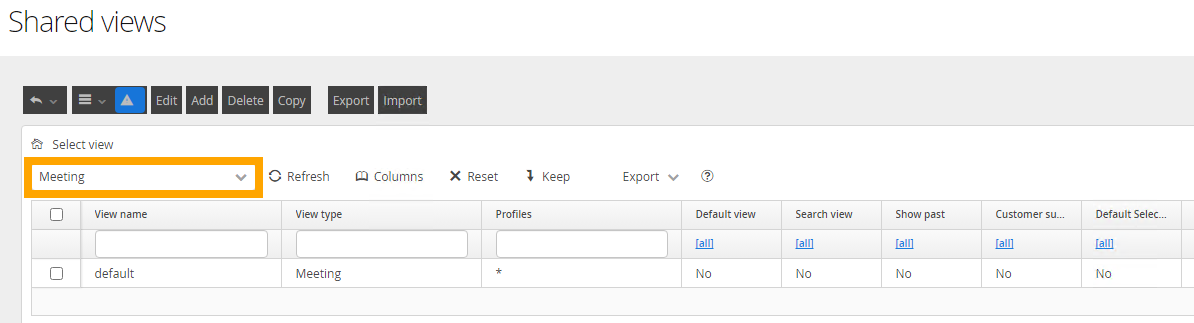
If a view called 'default' already exists, select it and then click Edit, change its configuration as shown below, then click Save. If required, multiple Meeting Room views can be configured to suit your business and user needs.
Complete configuration
Once you have completed each of these steps, Meetings should be configured and you can test the functionality. Your Mobile and Housing or Works Management solution may require additional specific configuration to use this functionality fully. Please get in contact with your Account Manager to organise time with our Solution Consultants to discuss what we believe will be required in your instance.