Dynamic Resource Scheduler
Whats New!
User Experience Changes
Security and Authentication
Modules and Utilities
Cyclical Scheduling - Configuration Interface
Cyclical Scheduling - Now Bulk Scheduling
Resource Quotas Improvements - Percentages
Architecture and Scheduling
Configuration
User Guides and Help
Get to Know Dynamic Resource Scheduler
How Does Dynamic Resource Scheduling Work
Speaking the Language of Scheduling
Navigating Dynamic Resource Scheduler
How your Data Links Together
Managing your Organisation
Viewing your Data
Your Customer Data
Your Service Orders
Your Jobs
Your Workers and Resources
Manage Your Tasks
Actioning your Jobs and Tasks
Job Templates
Find A Jobs Possible Workers
Locking Your Jobs
Create a Follow On Task
User Queues and Organising Your Tasks
Schedule and Organise
How to Optimise Your Scheduling
How to Schedule Manually
Scheduling Mutliple Jobs at Once
Reassign and Reschedule your Tasks
Managing Your Time and Durations
Managing your Comments and Contacts
Using Bookmarks to Drive Efficiency
Managing Your Job Status
Visualising Your Planning
Workers and Resources
Advanced Data Management
Creating Unavailability in your Workforce
Adding an Unavailability to an Individual Worker
Creating Unavailabilities for Multiple Days or Workers
Maps And Journey
Using Maps to Visualise Your Data
Using Maps With Your Data
Learn about our Closest Function
Your Journeys
Meetings and Non-Productive Planning
Administer Your Scheduler
Managing Your Organisations and Agencies
Managing Your Custom Data
Managing your Contracts
Customising Your Experience
Managing Depots and Starting Locations
Managing Diary Bookmarks
Managing your External Chart Views
KPI Settings
Managing Your Priorities
Learn about Sectors
Managing Your Follow On Templates
Get To Know Your Working Time Calendar
Managing your SOR Templates
Managing your Job Templates
Managing Your Vocabulary
Managing Your Bookmarks
Manage Your Customer Templates
Get to Know Import and Export
Managing Your Tenant Code Rules
Managing your Order Templates
Managing Your Unavailability Reasons
Get To Know Your Working Time Calendars
Managing your Worker Templates
Releases and Readiness
DRS 6, DRS 5.7 and Job Manager
User Guides and Help
Get to Know DRS
Dynamic Scheduling - How does it work
Navigating DRS
Vocabulary and Concepts
Customers
Orders
Jobs
Scheduling Jobs
Job Functions
Workers
Views
Object Inheritance
Agencies
DRS Modules
Scenario Based Planning
Managing your SMS Service
5.7 Documentation
Technical Documentation
Release Notes
DRS 6.1 Release Notes
DRS 6.1.22 - February 20, 2026
DRS 6.1.21 - September 10, 2025
DRS 6.1.20 - April 20th, 2025
DRS 6.1.19 - 11th April, 2025
DRS 6.1.18 - 13 February 2025
DRS 6.1.17 - 20th December 2024
DRS 6.1.16 - November 8th, 2024
DRS 6.1.15 - October 10th, 2024
DRS 6.1.14 - 6th September 2024
DRS 6.1.13 - 9th August 2024
DRS 6.1.12 Release Notes
DRS 6.1.11 Release Notes
DRS 6.1.10 Release Notes
DRS 6.1.9 Release Notes
DRS 6.1.8 Release Notes
DRS 6.1.7 Release Notes
DRS 6.1.6 Release Notes
DRS 6.1.5 Release Notes
DRS 6.1.4 Release Notes
DRS 6.1.3 Release Notes
DRS 6.1.2 Release Notes
DRS 6.1.1 Release Notes
DRS 6.1.0 Release Notes
DRS 6.0 Release Notes
DRS 6.0.0.0 Release Notes
DRS 6.0.0.1 Release Notes
DRS 6.0.0.2 Release Notes
DRS 6.0.0.3 Release Notes
DRS 6.0.0.4 Release Notes
DRS 6.0.0.6 Release Notes
DRS 6.0.1.0 Release Notes
DRS 6.0.1.1 Release Notes
DRS 6.0.1.2 Release Notes
DRS 6.0.1.3 Release Notes
DRS 6.0.1.4 Release Notes
DRS 6.0.1.5 Release Notes
Kirona Housing
Job Manager 9
Job Manager 9.3.0 - October 2024
Job Manager 9.1.0 - December 2022
Job Manager 9.2.0 - November 2023
Release Notes Disclaimer
Administering your Field Service Products
Supported Versions Policies
Contents
Orders
Purpose
This article is written to help you learn about the concepts of Orders within DRS.
What are Orders?
Orders are generally created from your back office system, housing management system or CRM and passed into DRS. This contains all the data required to deliver the piece of work, such as; the issue that the Customer has raised, the priority of the work, the contract, any contact details, the reference number for the work and the target date of when it should be completed. This is then linked to the Customer Record, and a Job Record with the required scheduling details to deliver the task.
Orders can contain multiple Jobs within DRS and acts as the main reference for each subsequent visit to get the piece of work completed.
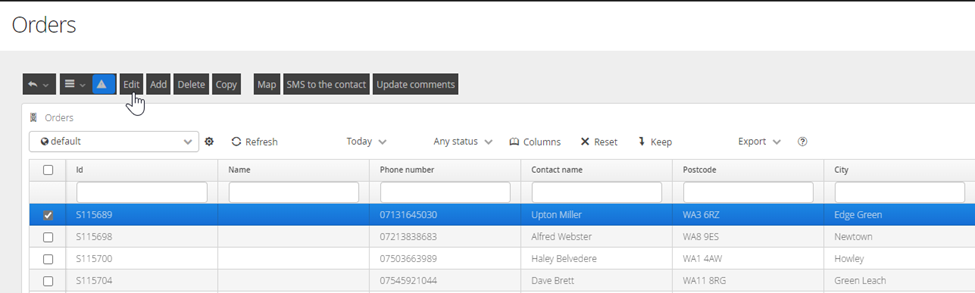
Viewing an Order
To access an Order, click on the Orders menu item from the left hand navigation to be taken to the Order screen.
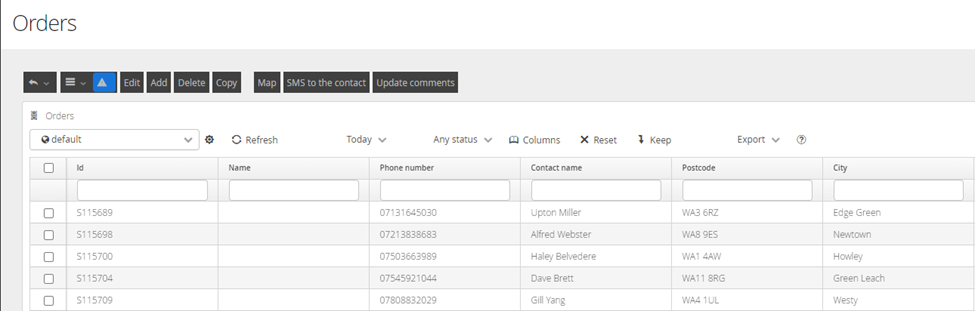
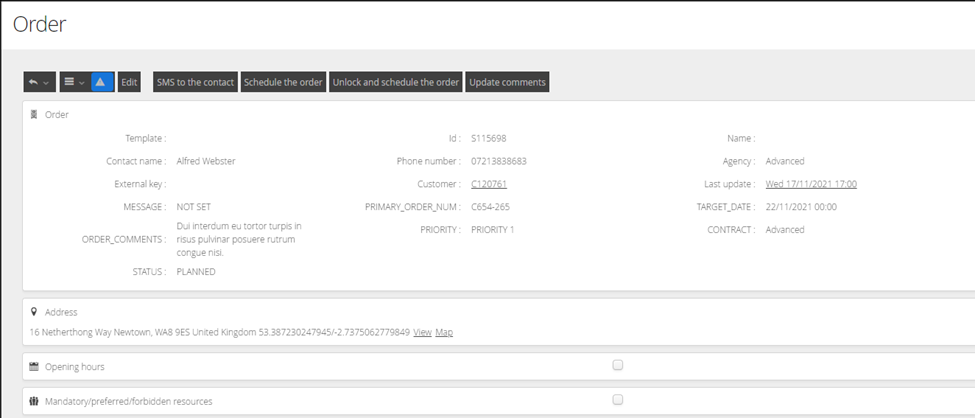
From here you can click on any Order to be taken to the Order Details screen
To see associated Jobs click on Show Data in the Jobs section

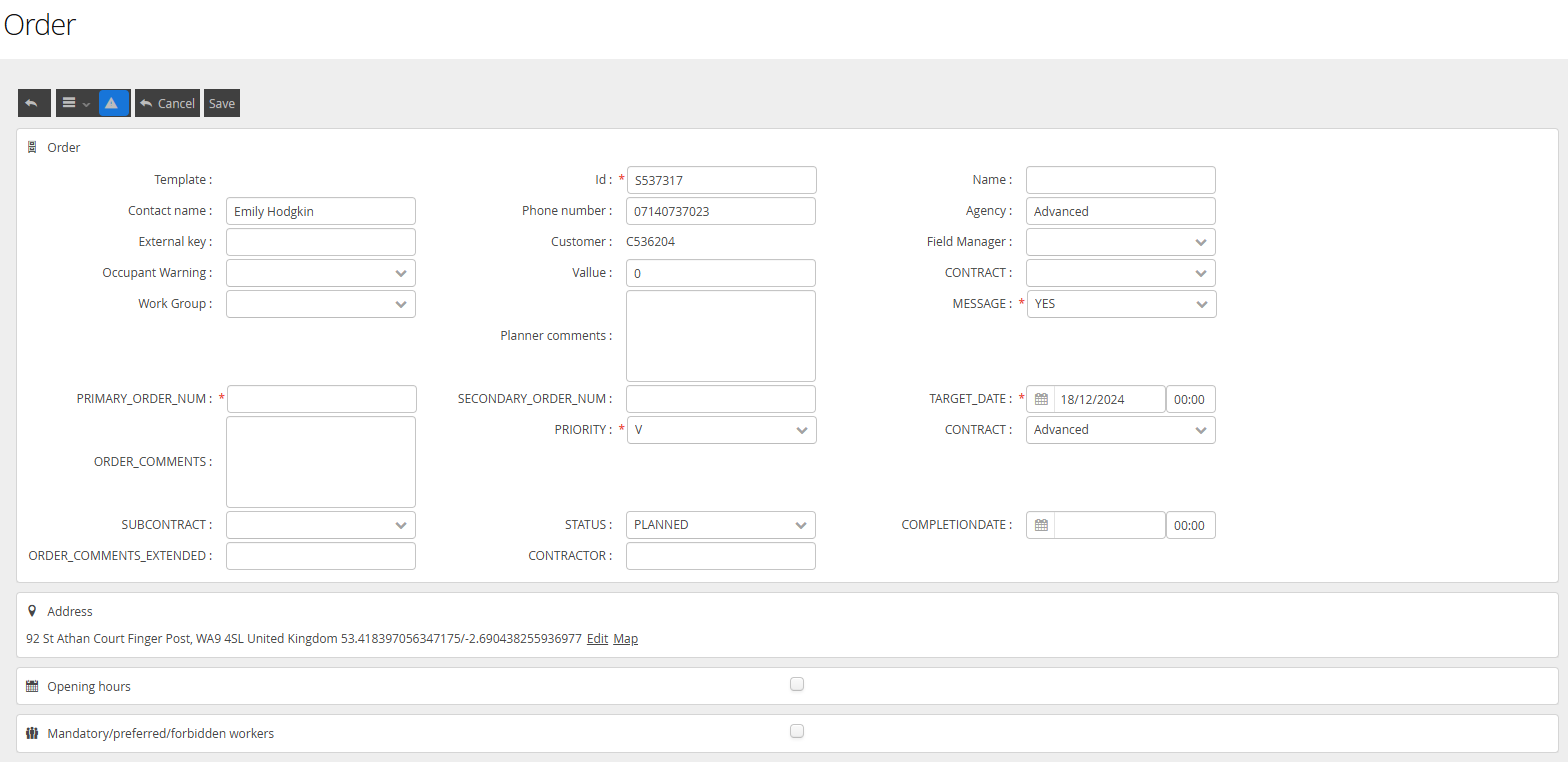
Detailed Fields on Orders
The following table details the possible options within the Order. Fields marked in BOLD are mandatory.
Field Name | Description |
Name | Will usually contain the primary order number from the back office system and is used in views to search for orders. |
Primary Order Number | see Name, provided from back office. If Name is different primary order number will be held here |
Contact Name | These will be displayed automatically based on customer provided on the order with UPRN mapping - Jobs map to Orders, Orders map to Customers. |
Customer ID | These will be displayed automatically based on customer provided on the order with UPRN mapping - Jobs map to Orders, Orders map to Customers. |
Address | These will be displayed automatically based on customer provided on the order with UPRN mapping - Jobs map to Orders, Orders map to Customers. |
Opening Hours for this order | These can be configured separately from the customer at this level. Otherwise, this detail will be inherited from the customer setup if applied. |
Mandatory/Preferred/Forbidden Workers | These can be configured separately from the customer at this level. Otherwise, this detail will be inherited from the customer setup if applied. |
Target Date | Provided from the back-office system based on customer SLA’s, the window for appointing work in DRS is created from creation date to target date at appointment level. |
Priority | Priority is mandatory and will be provided with values from the back office system. These must match the closed list Business Data you have configured. Priority will be based on categorisation of the work in the back-office system such as standard, routine or emergency for example. |
Contract | Contract is mandatory and will be provided with values from the back office system. These must match the closed list Business Data you have configured. Contract can be based on the contractor value required to do the work or from the contractor policies etc. setup in the back office system. |
Sub Contract | Subcontract can be populated in the same way as Contract, but is not Mandatory. These must match the closed list Business Data you have configured. Priority will be based on categorisation of the work in the back-office system such as standard, routine or emergency for example. |
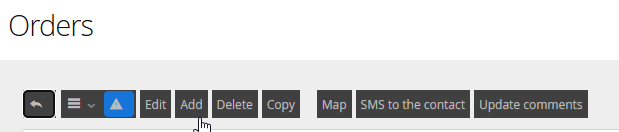
Adding an Order
Orders can be created directly within DRS. Orders created directly within DRS will not typically align with your integrating Housing System.
Clicking ADD will require you to select the Agency the Order will be aligned with.
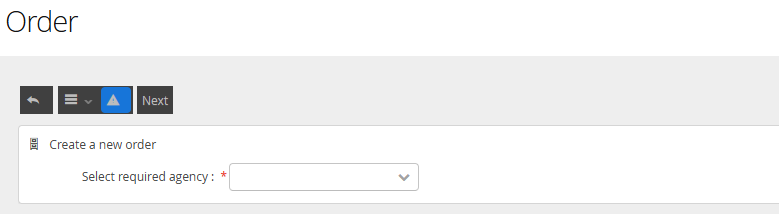
You will be offered a Customer selector to identify the Order location. You may need to search for your required customer to find the right one.

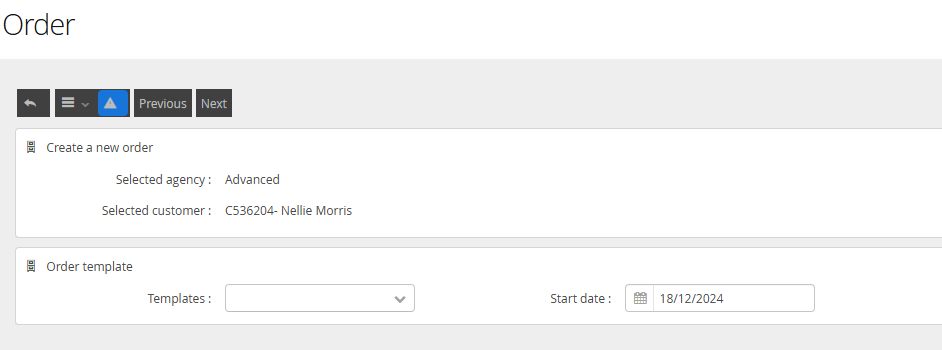
If you have Service Order Templates configured, you will be offered the opportunity to Select a Template. This can be left blank. You will need to set the START DATE for the Order, which will be used as the default Earliest Start Date.
You will need to complete all Mandatory fields at a minimum, marked with *'s. The table above provide an explanation of the expected data within the fields.
Edit an Order
Select an Order by placing a tick in the check box and selecting edit (or by right clicking your mouse on the entry), this will take you back to the Order Details screen for amendments to be applied, once done click save.
Field requirements are as above within the viewing screen.
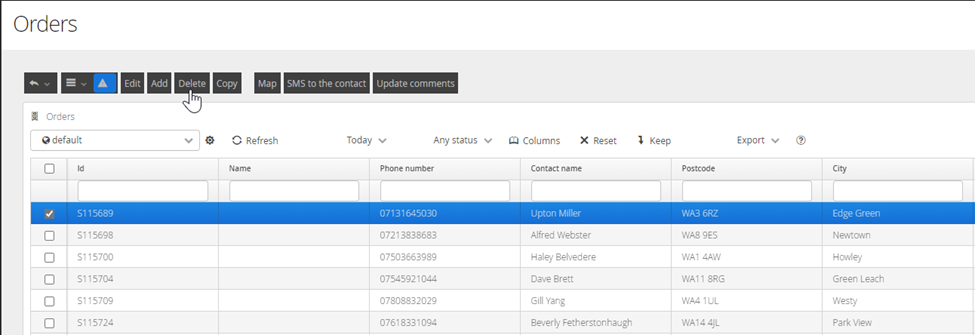
Delete an Order
Select an Order by placing a tick in the check box and selecting Delete, this will remove the Order and any associated jobs from the system.
Comments
Free text comments can be held against both Orders and Jobs. Comments are typically used to record further information from either the Customer, Contact Centre, Planner or Worker.
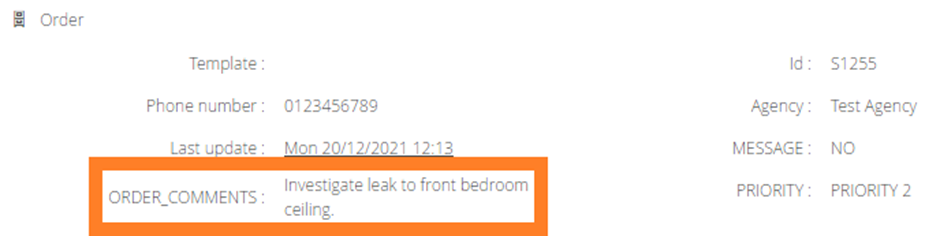
How to see the Order Comments
On the Order screen, see the Order Comments within the Order section.
How to edit the Order Comments
On the Order screen, click edit, change the Order Comments, then click save.
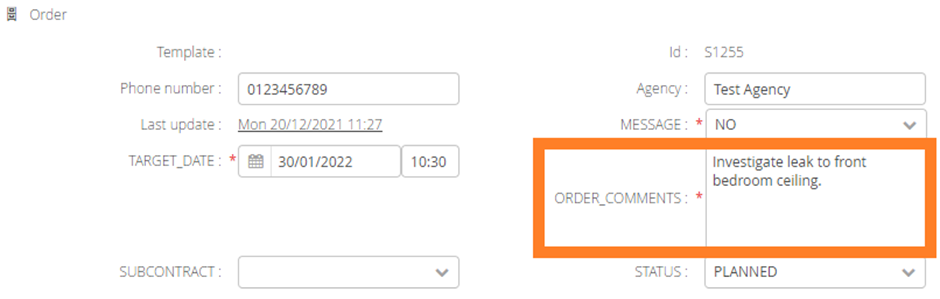
You can also edit comments via the Update comments button.