Dynamic Resource Scheduler
Whats New!
User Experience Changes
Security and Authentication
Modules and Utilities
Cyclical Scheduling - Configuration Interface
Cyclical Scheduling - Now Bulk Scheduling
Resource Quotas Improvements - Percentages
Architecture and Scheduling
Configuration
User Guides and Help
Get to Know Dynamic Resource Scheduler
How Does Dynamic Resource Scheduling Work
Speaking the Language of Scheduling
Navigating Dynamic Resource Scheduler
How your Data Links Together
Managing your Organisation
Viewing your Data
Your Customer Data
Your Service Orders
Your Jobs
Your Workers and Resources
Manage Your Tasks
Actioning your Jobs and Tasks
Job Templates
Find A Jobs Possible Workers
Locking Your Jobs
Create a Follow On Task
User Queues and Organising Your Tasks
Schedule and Organise
How to Optimise Your Scheduling
How to Schedule Manually
Scheduling Mutliple Jobs at Once
Reassign and Reschedule your Tasks
Managing Your Time and Durations
Managing your Comments and Contacts
Using Bookmarks to Drive Efficiency
Managing Your Job Status
Visualising Your Planning
Workers and Resources
Advanced Data Management
Creating Unavailability in your Workforce
Adding an Unavailability to an Individual Worker
Creating Unavailabilities for Multiple Days or Workers
Maps And Journey
Using Maps to Visualise Your Data
Using Maps With Your Data
Learn about our Closest Function
Your Journeys
Meetings and Non-Productive Planning
Administer Your Scheduler
Managing Your Organisations and Agencies
Managing Your Custom Data
Managing your Contracts
Customising Your Experience
Managing Depots and Starting Locations
Managing Diary Bookmarks
Managing your External Chart Views
KPI Settings
Managing Your Priorities
Learn about Sectors
Managing Your Follow On Templates
Get To Know Your Working Time Calendar
Managing your SOR Templates
Managing your Job Templates
Managing Your Vocabulary
Managing Your Bookmarks
Manage Your Customer Templates
Get to Know Import and Export
Managing Your Tenant Code Rules
Managing your Order Templates
Managing Your Unavailability Reasons
Get To Know Your Working Time Calendars
Managing your Worker Templates
Releases and Readiness
DRS 6, DRS 5.7 and Job Manager
User Guides and Help
Get to Know DRS
Dynamic Scheduling - How does it work
Navigating DRS
Vocabulary and Concepts
Customers
Orders
Jobs
Scheduling Jobs
Job Functions
Workers
Views
Object Inheritance
Agencies
DRS Modules
Scenario Based Planning
Managing your SMS Service
5.7 Documentation
Technical Documentation
Release Notes
DRS 6.1 Release Notes
DRS 6.1.22 - February 20, 2026
DRS 6.1.21 - September 10, 2025
DRS 6.1.20 - April 20th, 2025
DRS 6.1.19 - 11th April, 2025
DRS 6.1.18 - 13 February 2025
DRS 6.1.17 - 20th December 2024
DRS 6.1.16 - November 8th, 2024
DRS 6.1.15 - October 10th, 2024
DRS 6.1.14 - 6th September 2024
DRS 6.1.13 - 9th August 2024
DRS 6.1.12 Release Notes
DRS 6.1.11 Release Notes
DRS 6.1.10 Release Notes
DRS 6.1.9 Release Notes
DRS 6.1.8 Release Notes
DRS 6.1.7 Release Notes
DRS 6.1.6 Release Notes
DRS 6.1.5 Release Notes
DRS 6.1.4 Release Notes
DRS 6.1.3 Release Notes
DRS 6.1.2 Release Notes
DRS 6.1.1 Release Notes
DRS 6.1.0 Release Notes
DRS 6.0 Release Notes
DRS 6.0.0.0 Release Notes
DRS 6.0.0.1 Release Notes
DRS 6.0.0.2 Release Notes
DRS 6.0.0.3 Release Notes
DRS 6.0.0.4 Release Notes
DRS 6.0.0.6 Release Notes
DRS 6.0.1.0 Release Notes
DRS 6.0.1.1 Release Notes
DRS 6.0.1.2 Release Notes
DRS 6.0.1.3 Release Notes
DRS 6.0.1.4 Release Notes
DRS 6.0.1.5 Release Notes
Kirona Housing
Job Manager 9
Job Manager 9.3.0 - October 2024
Job Manager 9.1.0 - December 2022
Job Manager 9.2.0 - November 2023
Release Notes Disclaimer
Administering your Field Service Products
Supported Versions Policies
Contents
- All categories
- Dynamic Resource Scheduler
- User Guides and Help
- Manage Your Tasks
- Actioning your Jobs and Tasks
Actioning your Jobs and Tasks

This article explains the functions available when managing Jobs within DRS. These tools allow users to view, update and take action on job records as part of the scheduling and planning process.
Most of these functions are available as action buttons located at the top of the Jobs view, providing quick access to the most commonly used job management tasks.

Change Template
The Change Template function is normally used when either the Job Template comes through as Invalid (due to the SORs being used not being mapped to a Job Template), if the job has been diagnosed incorrectly and now requires a different trade, or if there is a need to have multiple operatives attend and you need to switch the Template to a paired Job Template.
Select a Job from the Jobs view and click on the Change Template button.

From this menu, select your new Target Template and click Save.
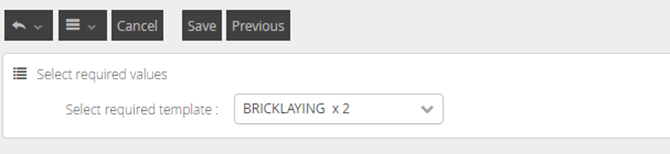
Once saved, the worker request will be changed to reflect the requirements of the new template and the possible workers will also change.
Follow On
If a Job cannot be resolved on first contact then it is advised to raise a follow on. By raising a follow on from the original Job, it will provide a direct link from one to another for auditing purposes.
Follow On jobs can be created in the job screen, from the job’s details page and within the diary using the action menu on the jobs.
To Create a follow on from the job section select a valid job from the Jobs list and clicking the Follow-On button.

The create follow on popup window will launch containing some generic details from the parent job.
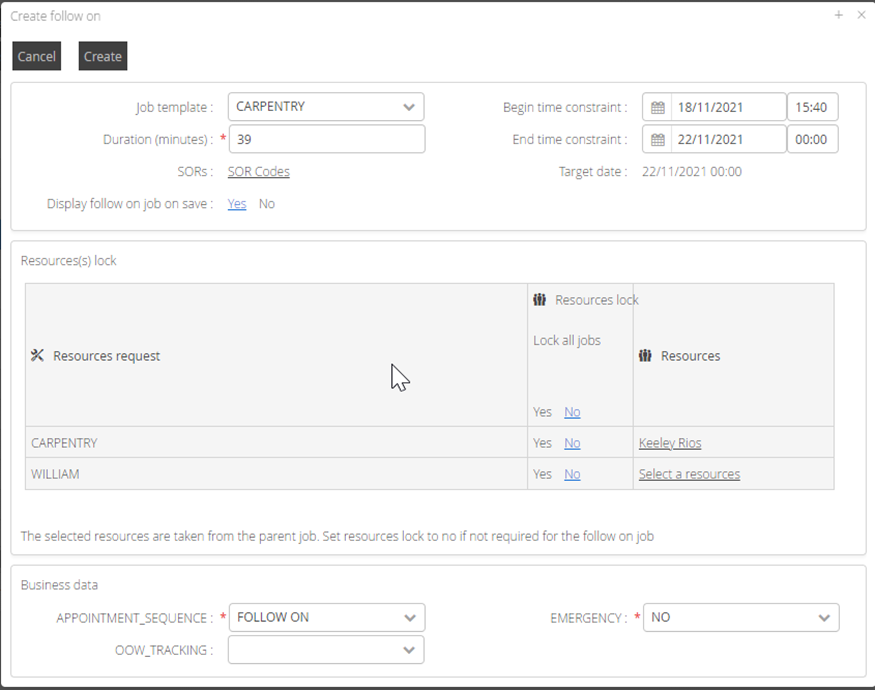
You can amend any of the required fields such as the duration, job template or workers required for example. Anything with a red star requires a value to be present and click Create. This will then take you into the job details screen for the new follow on Job that you have created.
Lock
Jobs can be locked to either the worker or the time that it has been scheduled into. You can bulk lock or individually lock jobs from within the Jobs screen.

Select a Job (or multiple) from the Jobs view and click the Lock button to display the Lock Job pop up window.

Clicking Yes or No for Time or Worker lock will set the required values. Once selected, click Save.
Map functions in Jobs
The DRS Map module allows you to see any object such as Customers, Workers and Jobs on a Map.
If you are a DRS Maps customer, you will see the following options:
Map
Selecting a Job (or multiple) from the Jobs view and clicking Map will show you the location of the Job on a map.

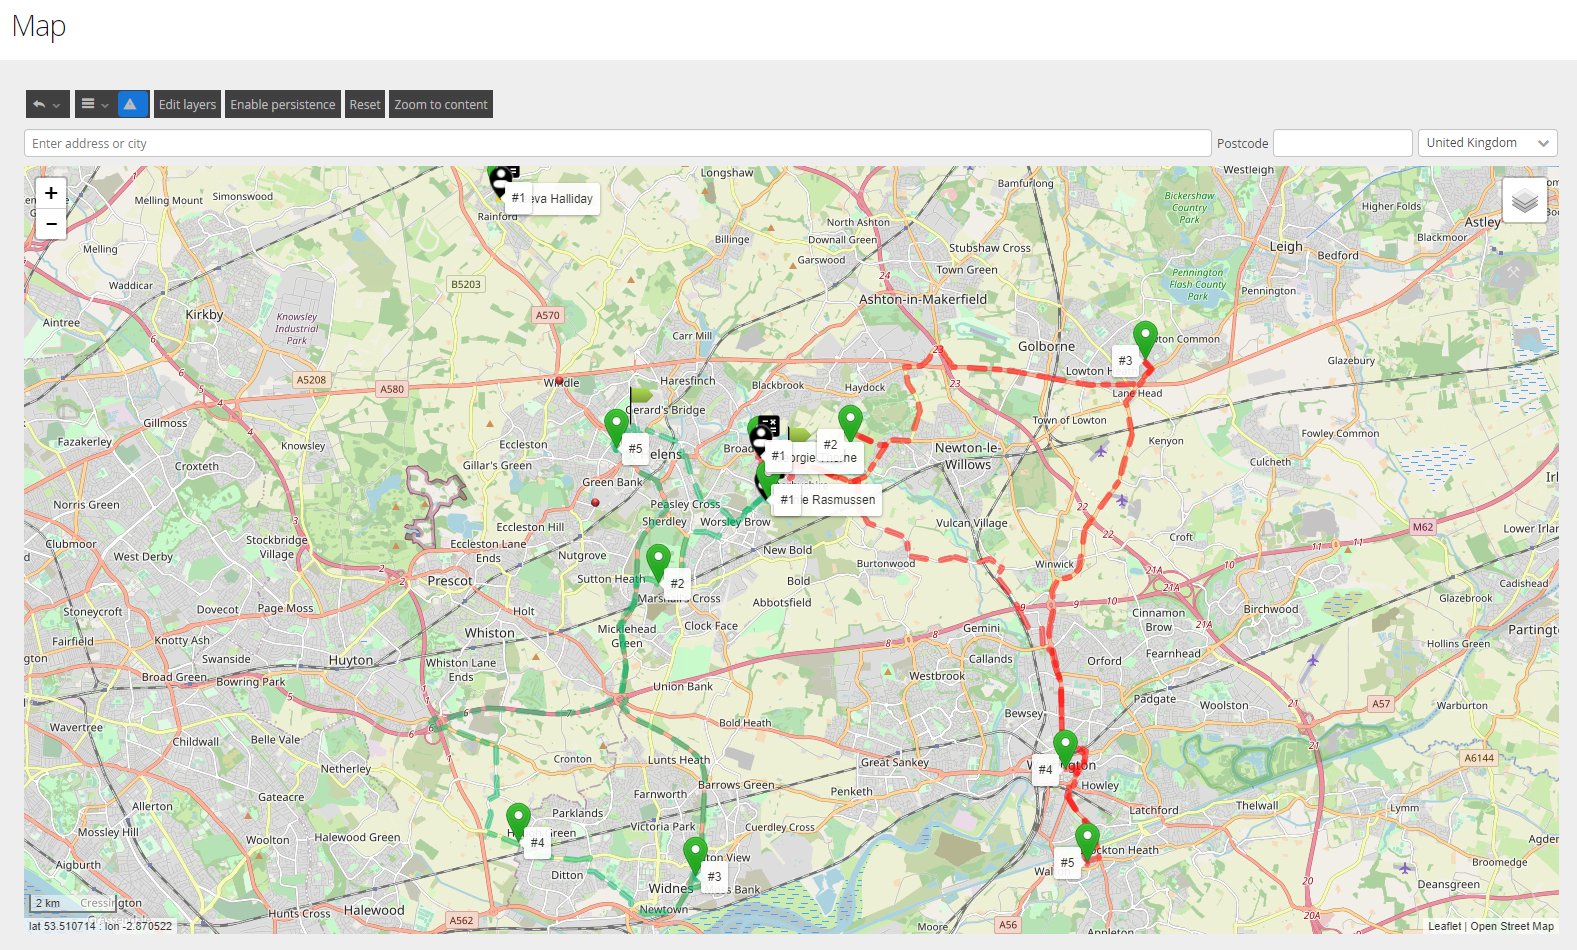
Journey

Selecting a Job (or multiple) from the Jobs view and clicking Journey will show the predicted route taken by the Workers to navigate to each customer. If selecting multiple jobs across multiple workers, these will be colour coded accordingly.
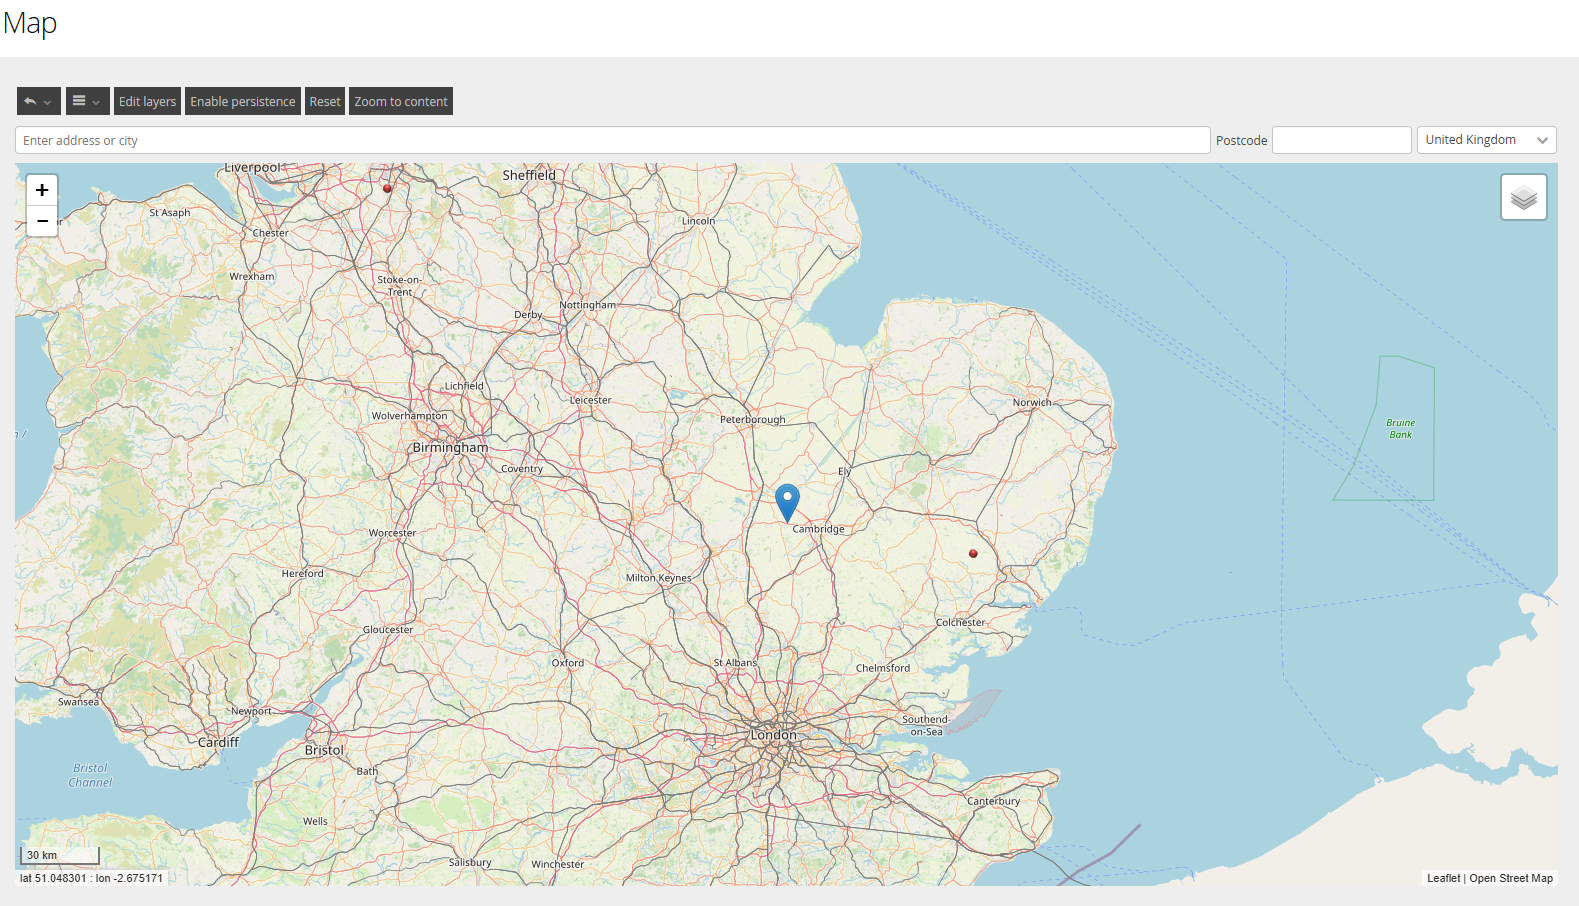
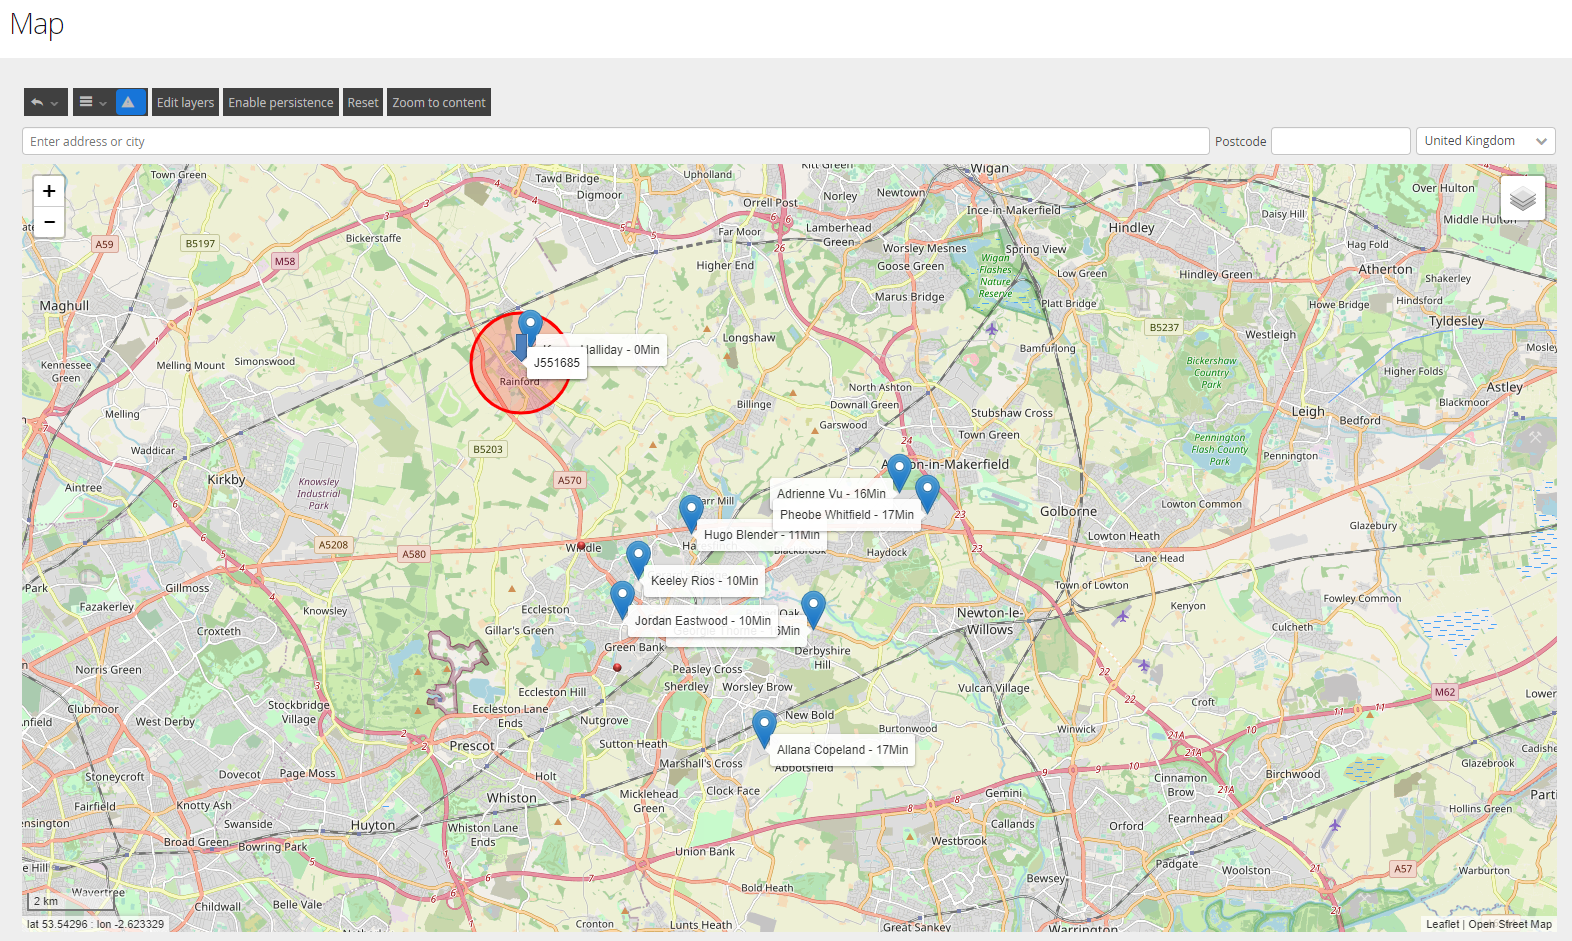
Closest
Selecting a Job from the Jobs view and clicking Closest will show you the job on the map and the workers that are able to do that Job.

The Job and relative area will show as a blue arrow with a red ring. All possible workers will be shown on the map with markers based on your configuration.
Possible Workers
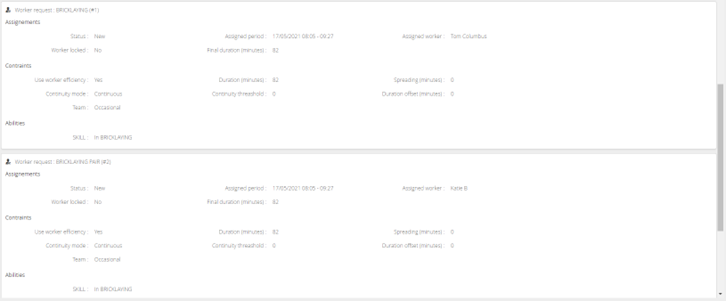
Selecting a Job from the Jobs view and selecting Possible Workers will display all workers who have the required abilities and sectors to deliver the Job.

From here you can see the home distance and details around the sector and its association to the worker as primary or secondary. You also have some further information on efficiency of the workers, variable skills and planning frozen dates if used.
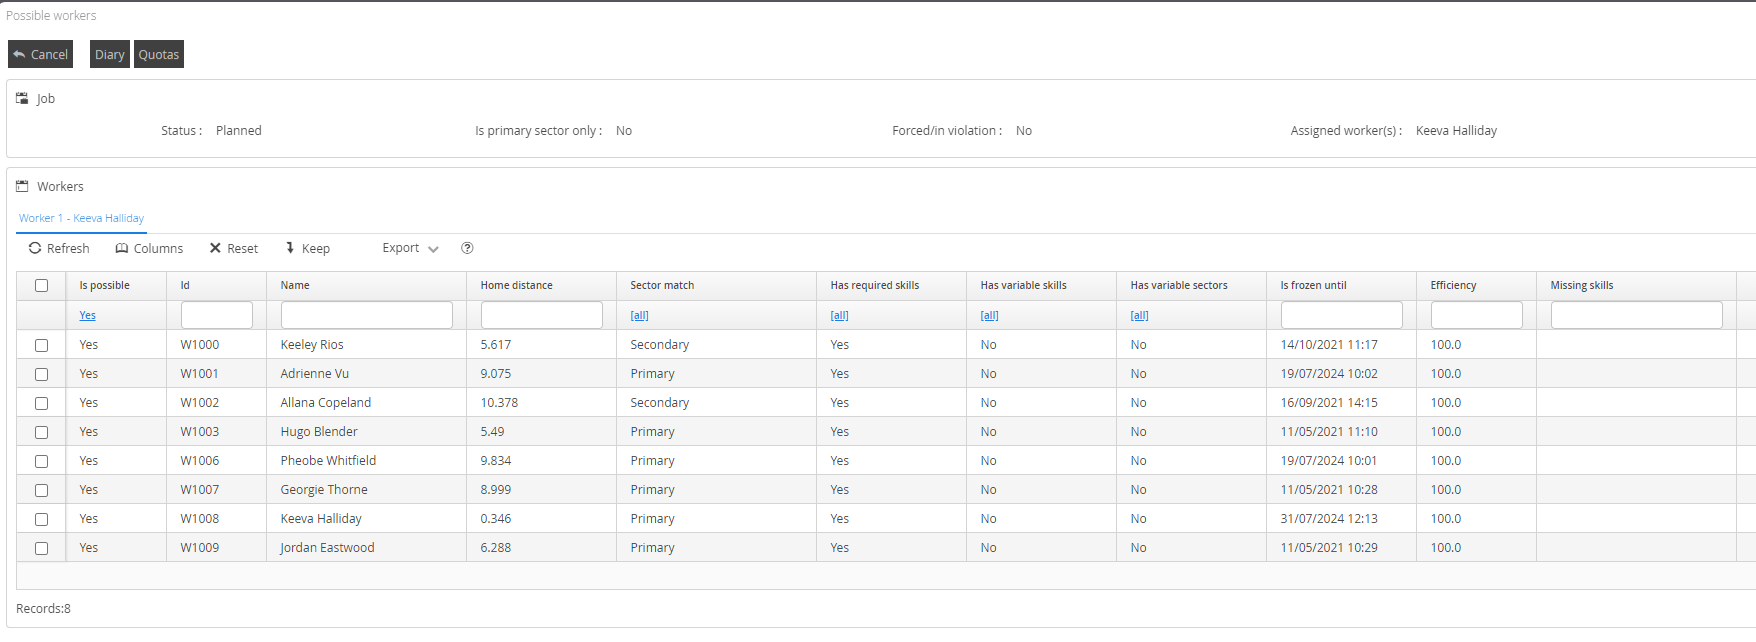
If you are using Quotas, you can also check the quota capacity of the operatives from this pop up. If you select and individual or a group of the listed workers and click on Quotas. This will display the amount of effort and available time currently allocated to the selected workers across all priorities in use.

Reassign
Jobs can be reassigned from the jobs view or from the action menu within the diary.

To reassign from the Jobs screen, select a single or multiple number of jobs from your Jobs view and click the Reassign Button.

Choose who to reassign Jobs | Description |
Ignore Job Assignment Period | Checking this box will result in the Job scheduling ignoring the Assignment Period when checking the possible workers against their working hours calendar. It will be extended to review against the Time Slot of the job instead. |
Ignore Required Abilities | Checking this box will result in the Worker list including people who do not match the ability requirement of the Job. |
Ignore Sectors | Checking this box will result in the Worker list including people who are not assigned the required Sector. |
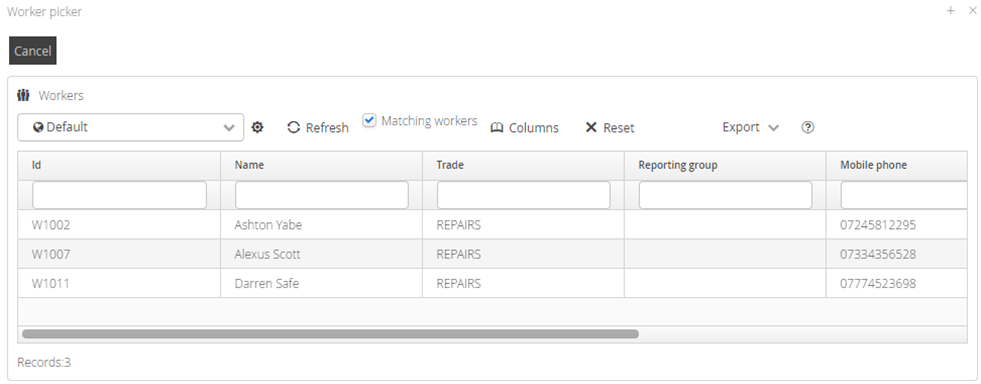
Selected Worker | From the Selected Worker section if you want to remove the associated worker click on the bin icon, to select a different worker select the pencil icon. This will open a list of workers with matching abilities |
Select a new Worker from the list and it will take you back to the reassign job pop up.
Reschedule Jobs: If the option is left unticked then it will look to move to the selected worker with no change to the time scheduled.
If ticked, it will result in the Scheduling Mode modal box appearing for selections to be made.
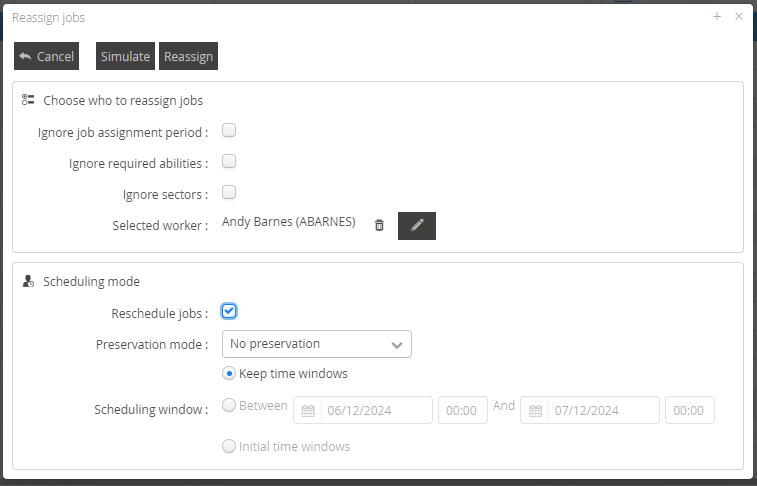
Scheduling Mode | Description |
Reschedule jobs | If the option is left unticked then it will look to move to the selected worker with no change to the time scheduled. |
Preservation Mode: No Preservation | During optimisation the Job may be assigned to a different Worker and/or Assignment Period, but it will stay within the Slot. |
Preservation Mode: Preserve All Planning | The system will not optimise the Job. The Job will stay fixed to the Worker and Assignment Period you selected. However, if this causes a violation the scheduling will fail. |
Preservation Mode: Preserve Other Routes | During optimisation the Job may move to a different Assignment Period but it will stay within the slot and with the Worker you selected. |
Preservation Mode: Preserve Other Routes and Route Order | During optimisation the Job may move to a different Assignment Period, but it will stay within the slot, with the Worker you selected and keep its position within the Worker’s route (i.e. the Worker’s Jobs for that day will not be re-sequenced ). |
Scheduling Window: Keep Time Windows | Will keep the time window already associated to the jobs, possibly moving some other jobs if needed depending on the preservation mode selected. |
Scheduling Window: Between | Will allow you to specify the window between dates and time you want to schedule |
Scheduling Window: Initial Time Window | Will revert to the initial time windows the job came in on |
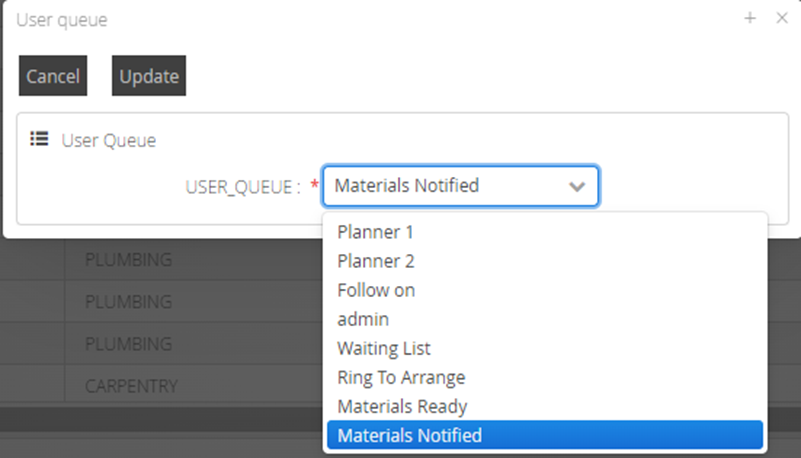
User Queue
User Queues are commonly used as a method of grouping Jobs together. For example those jobs that are unable to be scheduled due to capacity issues, Jobs that are able to be brought forward at short notice by tenant request or even those that need to be brought to attention for other reasons.

To change the User Queue associated to a job, select the Job from the Jobs view and click on the User Queue button.

The user queue pop up box will display, from here select the user queue required from the list of options and click on Update to apply.
Update Job Status
If there is a need to manually update the status of a Job due to failure in mobile updates or if you have contractors managing the Job who are unable to update it via mobile device, you can do so manually within DRS.
Select the Job from the Jobs view and click on Update Job Status.

This will open the job status pop up box, from here you can select the relevant radio button to progress the job status.
If Started is selected, you can amend the dates/times associated to increase the length of the Job.
If Completed is selected you can amend the dates/times associated to the job for accurate start and completed times, you also need to select a completion status from the available options.
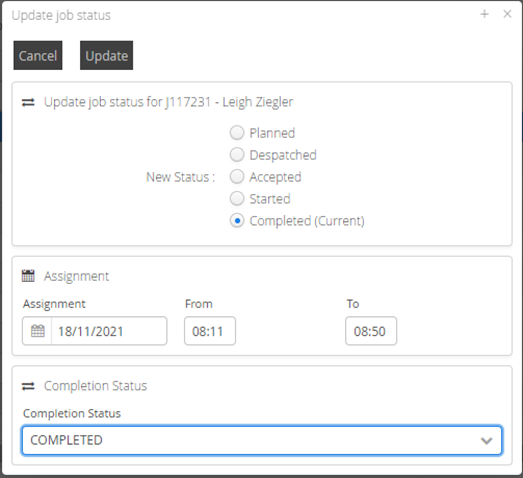
Click update once you have made your selection to update the job status. The status will be reflected on the job details screen and within the diary.